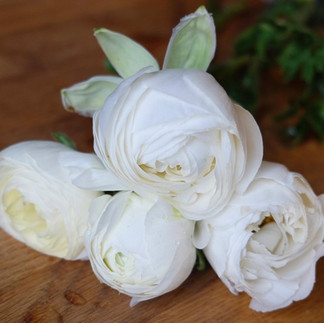
Nothing beats going out into your garden and picking an armful of your own grown cut flowers to grace your windowsill! So if you would like a garden brimming with flowers for cutting this summer, now is the perfect time to sow some hardy annuals. But what to grow and how is the best way to get those (sometimes pesky!) seeds to germinate?

Top seeds to sow now
It is still far too cold and dark to sow anything tender but this is a great time to start off some of the hardy annuals (plants which don't mind the cold so much!). Being annuals, these plants will grow, flower and die back all in the same year but they are guaranteed to give you a gorgeous show of flowers come the summer. Most of these are also 'cut and come again' which means you will be able to keep cutting from them all summer long.
Here is my, by no means exhaustive, list of hardy annuals for sowing now:


Germination tips
Most of these seeds could be sown directly outside but as I am growing mine for my business, I like to make sure I know exactly how many plants I have growing and I also like to protect them from the worst of the winter weather, so I start them all off inside. Here's my go-to method:

Fill a modular seed tray with peat free compost. I re-use my seed trays every year, hence the cracks, to avoid buying more plastic.
Make a small indent into each module and place your seed in. I normally put one seed to a module but you can multi-sow to save on space, though this will mean you may need to prick out your seedlings into their own space sooner.
Once your seeds are in, you can gently cover them over, though I do like to leave mine visible so I can keep an eye on germination!

Don't forget to write your label! Again, I re-use these labels every year by just cleaning them off with a bit of nail polish remover.

Finally, give your seeds a good drink. I like to put mine in a tray so that I can water from underneath - this stops you from washing away your carefully placed seeds!
Once watered, you can pop your tray on a windowsill. When mine have germinated, I then like to move them into our unheated greenhouse to make sure they're getting enough light.
I will then let my seeds grow on in the greenhouse until it's time to harden them off in a few months and finally plant them out - but that's a topic for another blog!
Ranunculus and Anemones
This time of year is also a good time to start off Ranunculus and Anemones. Growing both of these flowers is not for the faint hearted as they are renowned for being very particular! They dont like it too hot. Or too cold. Or too wet... Or too dry! But they do produce the most STUNNING blooms which will have you thanking and congratulating yourself on your perseverance skills. So here are my top tips:
First off you will need to soak your corms for a good four hours, or overnight.
I plant mine into larger sized module trays, with good drainage, using just peat free compost. With both Ranunculus and Anemones, I first make a hole in the compost and then place the corm in. I brush the soil up around the sides but like to leave the tops visible, so I can keep an eye on them!
Water your corms but not too much - they have already been soaking don't forget!
At this time of year, I like to place mine on a windowsill until I can see them beginning to sprout and then I pop them into the greenhouse to grow on, watering only when they are starting to look a bit dry.
So I hope I've inspired you to have a go at growing some of your own flowers this year! I would love to see how you're getting on so please tag @gouldberryflowers in any Instgram posts!
Have fun!
Lucy


Comments